 trannguyenhan
Để xác thực người dùng qua API trong Laravel chúng ta sẽ sử dụng một thư viện của bên thú 3 là tymondesigns/jwt-auth.
Cài đặt
Trước hết, tạo một project và kết nối nó tới database. Sau đó cài đặt thư viện jwt-auth bằng composer:
composer require tymon/jwt-auth
Thêm các config mới vào config/app.php:
'providers' => [
    ....
    ....
    Tymon\JWTAuth\Providers\LaravelServiceProvider::class,
],
'aliases' => [
    ....
    'JWTAuth' => Tymon\JWTAuth\Facades\JWTAuth::class,
    'JWTFactory' => Tymon\JWTAuth\Facades\JWTFactory::class,
    ....
],
Chạy lệnh artisan để xuất bản các tệp cấu hình của thư viện:
php artisan vendor:publish --provider="Tymon\JWTAuth\Providers\LaravelServiceProvider"
Sau khi chạy xong lệnh trên, quay lại thư mục config/ sẽ có thêm một file mới là jwt.php, là nơi đặt các file cấu hình của thư viện jwt-auth. Chúng ta không cần sửa bất cứ gì ở file này cả.
Tạo khóa bí mật bằng cách thực hiện lệnh sau:
php artisan jwt:secret
Sau khi chạy xong, quay lại file .env một biến môi trường mới được thêm vào file dạng JWT_SECRET={STRING}.
Cấu hình
Cập nhật Model User
Model user đã được tạo sẵn trong mỗi project Laravel. Giờ cần cập nhật để nó implement lại Tymon\JWTAuth\Contracts\JWTSubject và thêm vào 2 phương thức getJWTIdentifier() và getJWTCustomClaims():
<?php

namespace App\Models;

use Illuminate\Contracts\Auth\MustVerifyEmail;
use Illuminate\Database\Eloquent\Factories\HasFactory;
use Illuminate\Foundation\Auth\User as Authenticatable;
use Illuminate\Notifications\Notifiable;
use Laravel\Sanctum\HasApiTokens;
use Tymon\JWTAuth\Contracts\JWTSubject;

class User extends Authenticatable implements JWTSubject
{
    use HasApiTokens, HasFactory, Notifiable;

    /**
     * The attributes that are mass assignable.
     *
     * @var array<int, string>
     */
    protected $fillable = [
        'name',
        'email',
        'password',
    ];

    /**
     * The attributes that should be hidden for serialization.
     *
     * @var array<int, string>
     */
    protected $hidden = [
        'password',
        'remember_token',
    ];

    /**
     * The attributes that should be cast.
     *
     * @var array<string, string>
     */
    protected $casts = [
        'email_verified_at' => 'datetime',
    ];

    public function getJWTIdentifier()
    {
        return $this->getKey();
    }

    public function getJWTCustomClaims()
    {
        return [];
    }
}
Cấu hình Auth guard
Trong file config/auth.php, thực hiện một số thay đổi để Laravel sử dụng jwt xác thực cho ứng dụng và đặt default guard là api:
'defaults' => [
    'guard' => 'api',
    'passwords' => 'users',
],

...

'guards' => [
    'api' => [
        'driver' => 'jwt',
        'provider' => 'users',
    ],
],
Bây giờ chúng ta có thể sử dụng hệ thống Auth tích hợp sẵn của Laravel với jwt-auth.
Tạo route và AuthController
Thêm một số route vào routes/api.php như sau:
Route::group([
    'middleware' => 'api',
    'prefix' => 'auth'
], function () {
    Route::group(['middleware' => 'auth:api'], function(){
        Route::post('logout', [AuthController::class, 'logout']);
        Route::post('refresh', [AuthController::class, 'refresh']);
        Route::post('me', [AuthController::class, 'me']);
    });

    Route::post('login', [AuthController::class, 'login']);
    Route::post('register', [AuthController::class, 'register']);
});
Tạo AuthController bằng artisan command:
php artisan make:controller AuthController
Đặt đoạn mã sau vào trong Controller vừa tạo:
<?php

namespace App\Http\Controllers;

use App\Helper;
use App\Http\Requests\Auth\LoginRequest;
use App\Http\Requests\Auth\RegisterRequest;
use App\Models\User;
use Illuminate\Http\JsonResponse;

class AuthController extends Controller
{
    /**
     * Get a JWT via given credentials.
     *
     * @param LoginRequest $request
     * @return JsonResponse
     */
    public function login(LoginRequest $request): JsonResponse
    {
        $credentials = $request->only(['email', 'password']);

        if (! $token = auth()->attempt($credentials)) {
            return response()->json(['error' => 'Unauthorized'], 401);
        }

        return Helper::successResponseWithToken($token);
    }

    /**
     * Get the authenticated User.
     *
     * @return JsonResponse
     */
    public function me(): JsonResponse
    {
        return Helper::successResponse(auth()->user());
    }

    /**
     * Log the user out (Invalidate the token).
     *
     * @return JsonResponse
     */
    public function logout(): JsonResponse
    {
        auth()->logout();
        return Helper::successResponse();
    }

    /**
     * Refresh a token.
     *
     * @return JsonResponse
     */
    public function refresh(): JsonResponse
    {
        $newToken = auth()->refresh();
        return Helper::successResponseWithToken($newToken);
    }

    /**
     * Register new account
     * @param RegisterRequest $request
     * @return JsonResponse
     */
    public function register(RegisterRequest $request): JsonResponse
    {
        $data = $request->all();
        $data['password'] = bcrypt($data['password']);

        $user = new User();
        $user->fill($data);
        $user->save();

        return Helper::successResponse(true);
    }
}
Trong Controller sử dụng một số lớp bên ngoài như Helper, RegisterRequest, LoginRequest,… để xem đầy đủ bạn có thể xem trực tiếp project qua GITHUB: https://github.com/hacerweb/laravel-jwt-auth
Kiểm tra
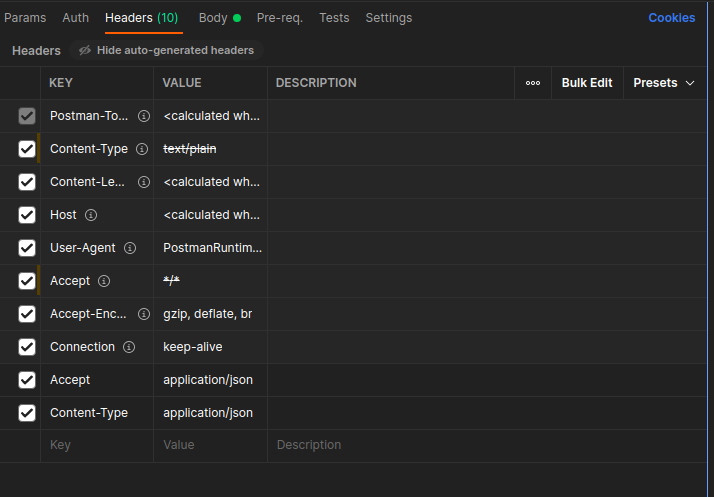
Sau khi xong giờ mở Postman lên để kiểm tra API, với môi request hãy thêm 2 tham số như sau vào trong header:
{
    "Accept": "application/json",
    "Content-Type": "application/json"
}
Trong Postman chúng ta chỉ cần thêm vào như sau:
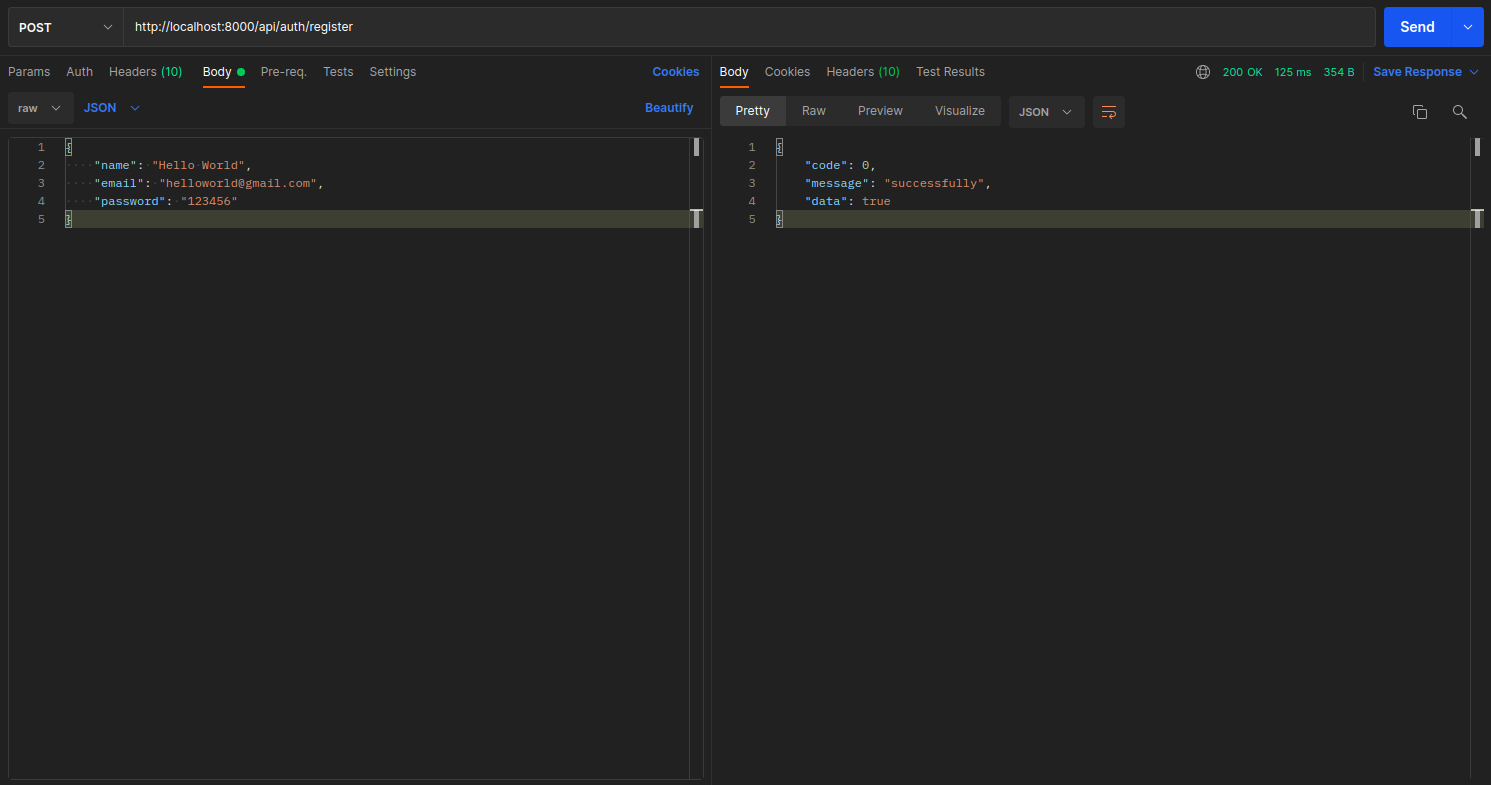
API đăng kí
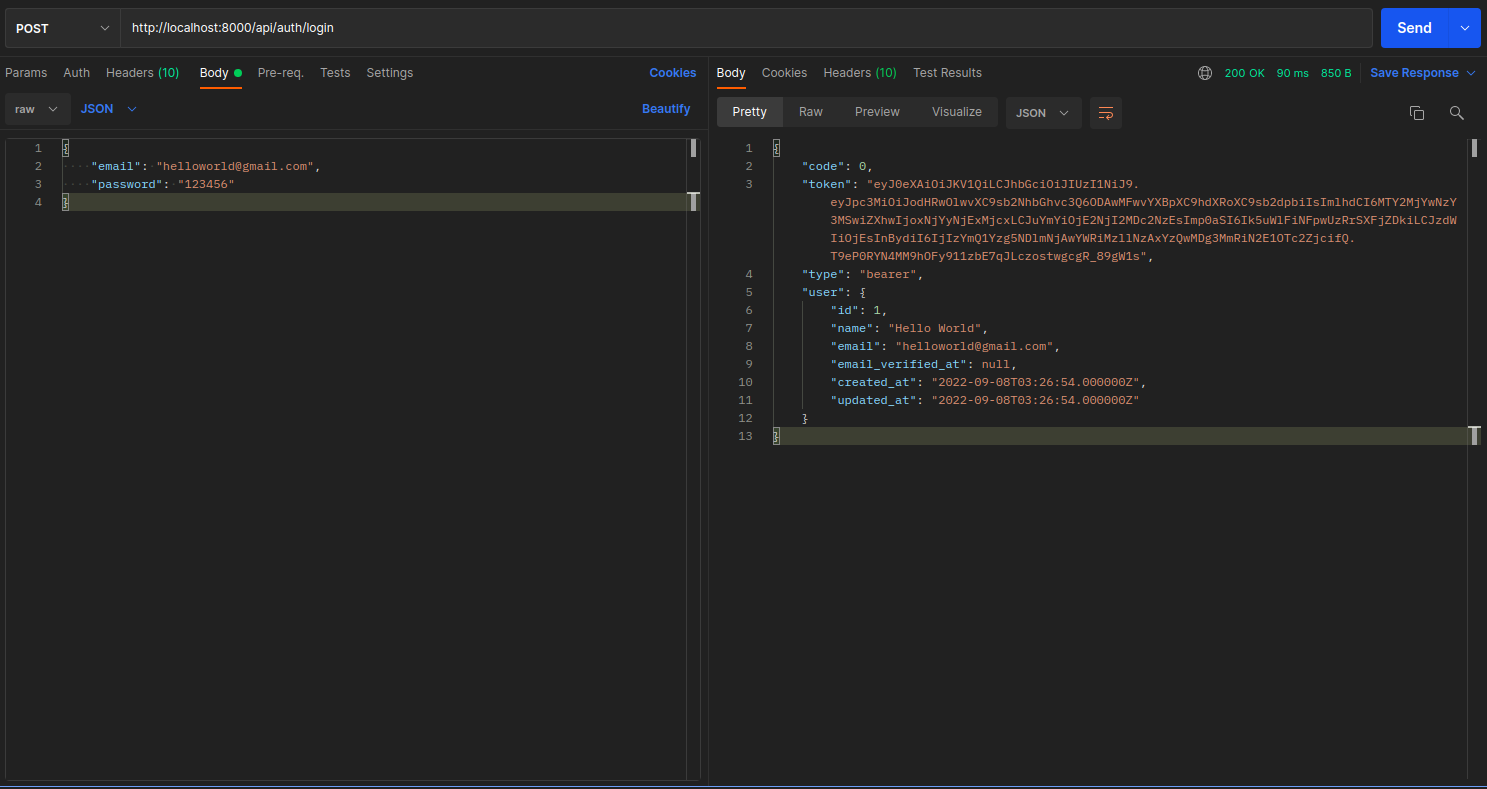
API đăng nhập
API get-me
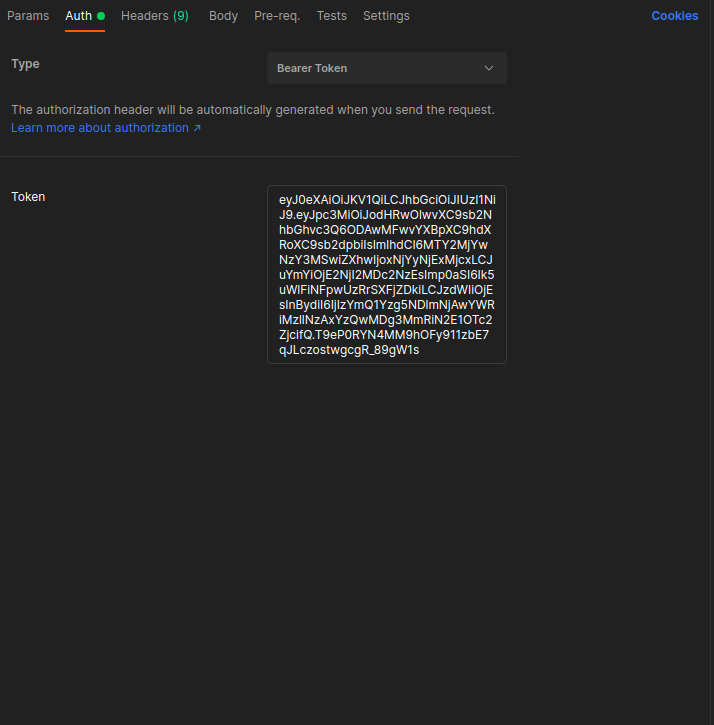
Với API này chỉ những người đã đăng nhập mới có thể sử dụng, vì vậy trước khi gọi, hãy bỏ token mà bạn vừa đăng nhập xong vào mục Auth->Bearer Token:
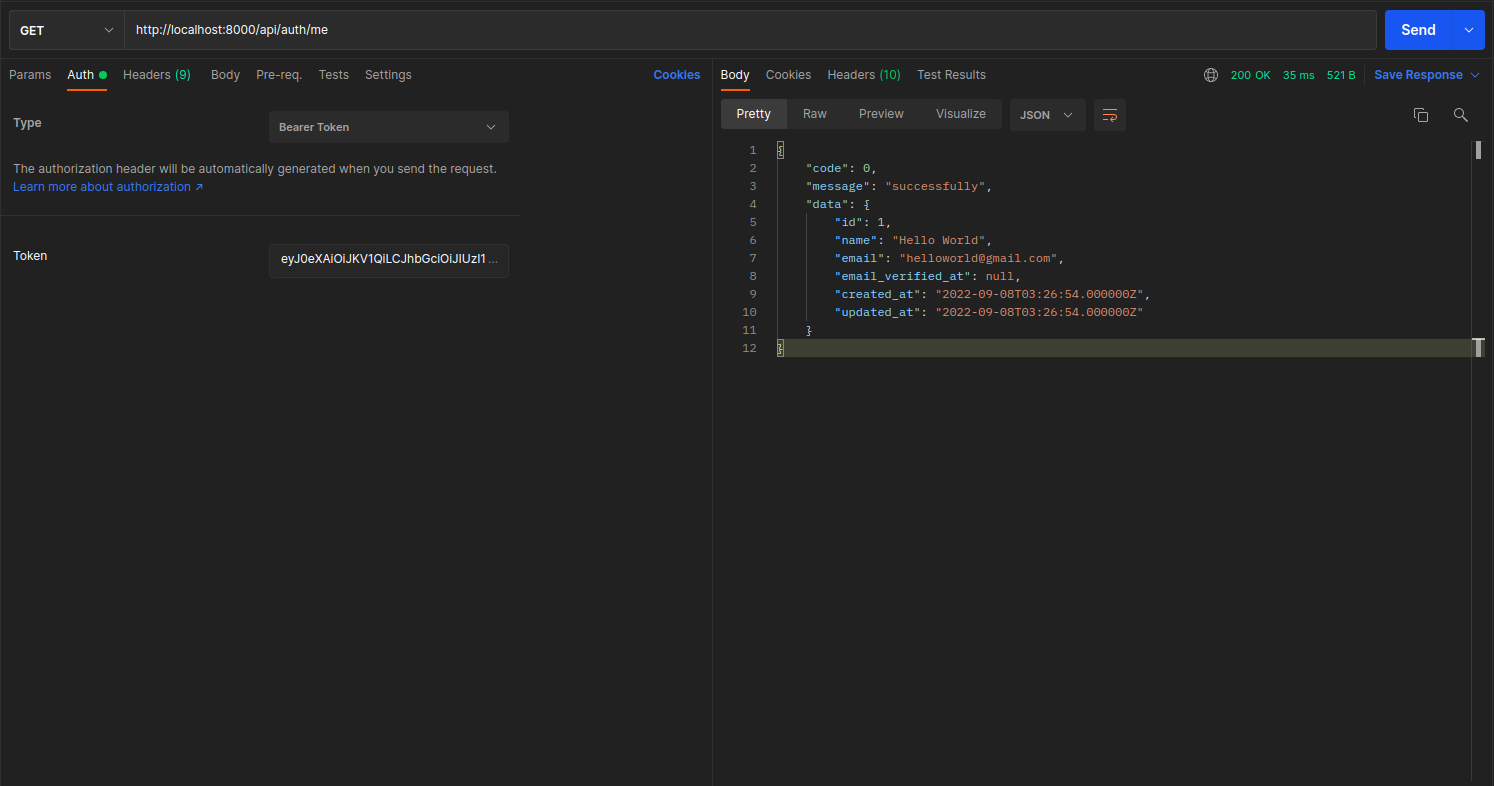
Sau đó gọi API để lấy kết quả:
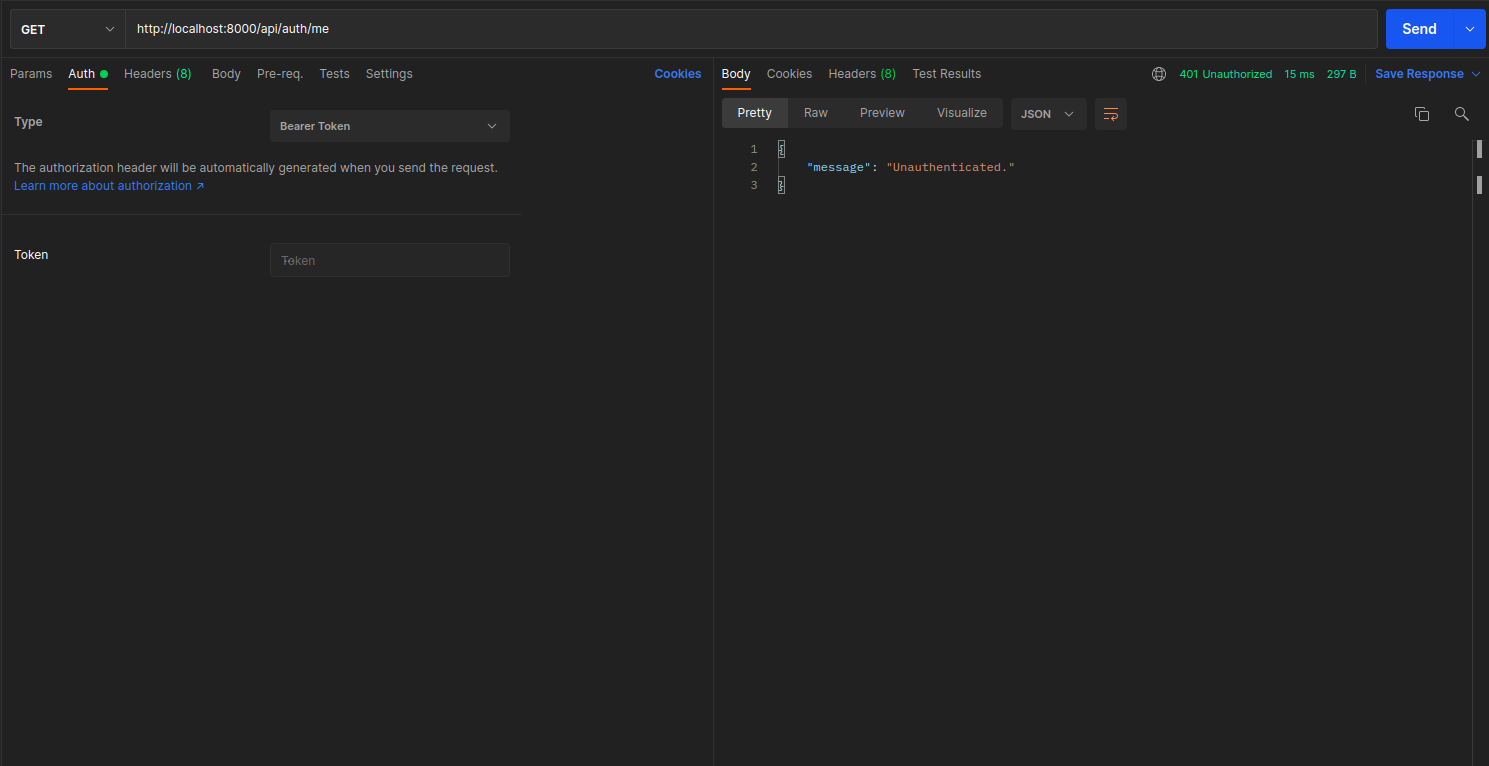
Nếu không có token (hay gọi là chưa đăng nhập) thì kết quả trả về sẽ không thể lấy được thông tin người dùng:
Tham khảo: https://jwt-auth.readthedocs.io, https://www.positronx.io, https://github.com/hacerweb/
 Laravel | Laravel permission